

“Want to replace your garage door seal? Start by measuring the length needed, then remove the old seal and install the new one for a tight fit! #DIYtips”
Replacing the garage door seal is a simple and practical task that can help maintain a comfortable and energy-efficient space. Over time, garage door seals can become worn or damaged, leading to drafts, moisture, and even pests entering the garage. Fortunately, replacing the seal is a relatively straightforward process that can be done by most homeowners. By following a few steps, such as measuring the seal, removing the old one, and installing the new seal, you can successfully complete this maintenance task. With a properly installed garage door seal, you can enjoy a well-insulated and protected garage, ensuring your belongings are safe from the elements.
Why should you replace your garage door seal?
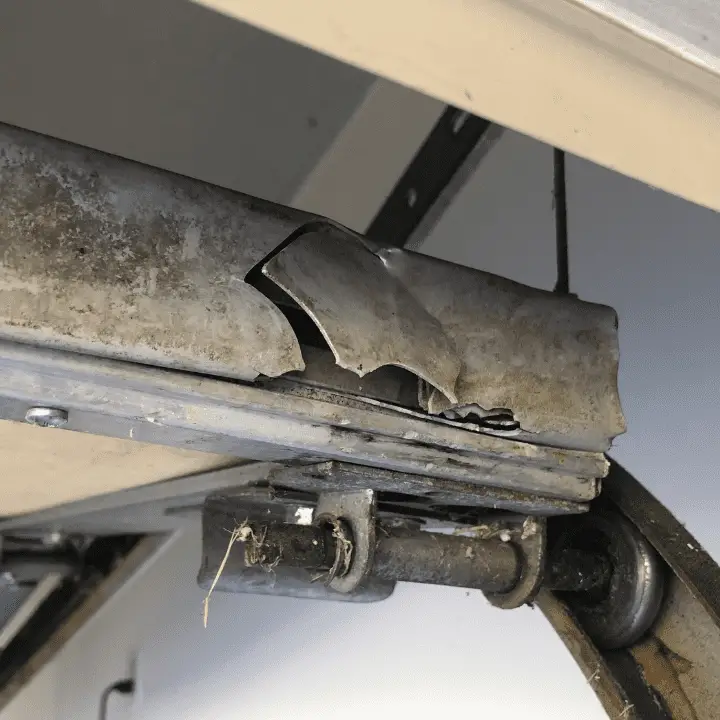
In order to maintain the functionality and efficiency of your garage, it is crucial to regularly inspect and replace your garage door seal. This often overlooked component plays a pivotal role in preventing various issues and keeping your garage secure. In this article, we will delve into the reasons why you should prioritize the replacement of your garage door seal and the benefits it can bring.
One of the primary reasons to replace your garage door seal is to enhance energy efficiency. Over time, seals become worn out and lose their ability to insulate your garage effectively. This can result in energy loss, causing your heating or cooling systems to work extra hard and lead to higher energy bills. By investing in a new seal, you can improve insulation and reduce energy wastage, ultimately saving on your utility costs.
Besides energy efficiency, a damaged or deteriorated garage door seal can also compromise the security of your property. A worn-out seal creates gaps and openings, making it easier for unwanted pests and critters to enter your garage. In addition, it can also allow dust, dirt, and other debris to accumulate, negatively impacting the cleanliness and overall condition of your garage. By replacing the seal, you can effectively seal off these potential entry points and maintain a clean and protected space.
Furthermore, a faulty garage door seal can lead to water leakage during heavy rainfall or snowfall. This can result in water damage to your belongings stored in the garage, as well as the potential for mold and mildew growth. By installing a new seal, you can effectively prevent water intrusion and safeguard your valuable possessions.
Regularly replacing your garage door seal also contributes to the longevity of your garage door. The seal acts as a protective barrier, preventing moisture, debris, and other external elements from causing damage to the door and its components. By ensuring a tight and secure seal, you can extend the lifespan of your garage door and avoid expensive repairs or replacements in the future.
In conclusion, prioritizing the replacement of your garage door seal is essential for maintaining energy efficiency, security, and overall functionality of your garage. By investing in a new seal, you can improve insulation, prevent pest infestations, protect against water damage, and prolong the lifespan of your garage door. Don’t overlook the importance of this seemingly small component, as it can significantly impact the well-being of your garage and its contents.

Step-by-Step Guide to Replacing Your Garage Door Seal
Is your garage door seal worn out or damaged? Don’t worry, replacing it is easier than you think. In this step-by-step guide, we will walk you through the process of replacing your garage door seal, ensuring a tight seal and keeping unwanted elements out of your garage.
Step 1: Assess the condition of your current seal
Start by carefully inspecting your garage door seal. Look for any signs of wear, cracks, or tears. If the seal is damaged beyond repair, it’s time to replace it.
Step 2: Measure the length of your garage door
Using a measuring tape, carefully determine the length of your garage door. This measurement will help you select the correct size of the replacement seal.
Step 3: Purchase the replacement seal
Visit your local hardware store or go online to purchase a new garage door seal. Make sure to choose one that matches the length of your door. Additionally, opt for a high-quality seal to ensure durability and longevity.
Step 4: Remove the old seal
Gently remove the old seal by pulling it away from the bottom of the garage door. Use a putty knife or a flathead screwdriver to loosen and detach it, taking care not to damage the door or the surrounding area.
Step 5: Clean the garage door bottom
After removing the old seal, it’s essential to clean the bottom of your garage door thoroughly. Use a mild cleaning solution and a cloth to remove any dirt, debris, or adhesive residue.
Step 6: Install the new seal
Starting from one end, carefully attach the replacement seal to the bottom of your garage door. Apply firm pressure to ensure a secure fit. Continue attaching the seal along the entire length of the door, making sure it is straight and tight.
Step 7: Trim the excess seal
Using a utility knife, trim any excess length of the seal at the ends. This will ensure a neat and professional-looking installation.
Step 8: Test the new seal
Finally, close your garage door and inspect the new seal. Make sure it forms a tight seal and that there are no gaps or areas of concern. Test the door’s operation to ensure it moves smoothly.
By following these simple steps, you can replace your garage door seal and enjoy a well-insulated and weather-protected garage. Remember, regular maintenance and inspection of your seal will prolong its lifespan and keep your garage in top shape.
Common Problems with Garage Door Seals
Garage door seals play a crucial role in keeping your garage insulated and protected from external elements such as dirt, dust, and moisture. However, over time, these seals can experience various issues, leading to potential problems. In this article, we will discuss the common problems associated with garage door seals and provide you with effective solutions to fix them.
Ineffective sealing
One of the most common problems with garage door seals is ineffective sealing. If you notice that your garage door is not sealing properly, it can result in energy loss and allow external elements to enter your garage.
The solution to this problem is to first inspect the seal for any visible damage or wear. If you spot any cracks or gaps, it is essential to replace the seal. Measure the length of the old seal and purchase a replacement of the same size. Fix the new seal in place, ensuring it is tightly pressed against the door to create a proper seal.
Worn out weatherstripping
Weatherstripping is another crucial component of garage door seals. It helps to prevent drafts, noise, and water from entering your garage. However, over time, weatherstripping can wear out and become less effective.
To fix this problem, start by inspecting the weatherstripping for any signs of wear or damage. If you notice any cracks, tears, or missing sections, it is necessary to replace the weatherstripping. Measure the length of the old weatherstripping and purchase a new one. Install the new weatherstripping carefully, making sure it is tightly secured along the edges of the garage door.
Improper installation
Improper installation of garage door seals can lead to various problems. If the seal is not installed correctly, it will fail to provide the necessary insulation and protection for your garage.
The solution to this issue is to carefully inspect the installation of the seal. Ensure that it is correctly aligned and evenly positioned along the edges of the garage door. If you notice any misalignment or gaps, adjust the seal accordingly. Additionally, make sure to follow the manufacturer’s guidelines and instructions for proper installation.
Neglected maintenance
Regular maintenance is essential to ensure the longevity and effectiveness of garage door seals. Neglecting maintenance can lead to deterioration and performance issues.
To maintain your garage door seals, clean them regularly with a mild detergent and water. Remove any dirt or debris that may have accumulated. Additionally, lubricate the seals with a silicone-based lubricant to keep them flexible and prevent cracking or drying out.
Conclusion
In conclusion, garage door seals can encounter common problems over time, but fortunately, they can be easily fixed. By addressing the issues of ineffective sealing, worn out weatherstripping, improper installation, and neglected maintenance, you can ensure that your garage remains well-insulated and protected. Regularly inspect your seals and address any problems promptly to avoid costly repairs in the future. Remember, maintaining your garage door seals not only enhances the energy efficiency of your garage but also prolongs its lifespan.
Best materials and tools for replacing a garage door seal
When it comes to maintaining your garage door, one of the essential tasks is replacing the door seal. Over time, the seal can become worn out and ineffective, leading to drafts, water leaks, and increased energy bills. In this article, we will discuss the best materials and tools you need for replacing a garage door seal, ensuring a proper and efficient installation process.
1. Weather-resistant rubber seal: The first step in replacing a garage door seal is to choose the right material. Opt for a weather-resistant rubber seal that is durable and can withstand various weather conditions. Look for seals that have UV protection to prevent cracking and fading over time.
2. Measuring tape: To ensure a precise fit, you will need a measuring tape to measure the length of your garage door. Start from one end and measure all the way to the other side. Add an additional few inches to account for any overlap. Make sure to measure both the top and bottom edges of the door for an accurate measurement.
3. Utility knife: A utility knife will come in handy for removing the old seal from the garage door. Carefully slice through the seal to remove it entirely. Be cautious during this process to avoid damaging the door or injuring yourself.
4. Adhesive: To secure the new seal in place, you will need a strong adhesive. Look for an adhesive specifically designed for outdoor use and compatible with rubber materials. Apply the adhesive to the bottom edge of the garage door and press the seal firmly onto it. Allow sufficient drying time according to the adhesive manufacturer’s instructions.
5. Garage door seal replacement kit: Investing in a garage door seal replacement kit can save you time and effort. These kits usually include all the necessary materials and tools mentioned above, along with step-by-step instructions. They come in various sizes, so make sure to choose one that matches the dimensions of your garage door.
6. Safety goggles and gloves: Lastly, do not forget to prioritize safety during the installation process. Wear safety goggles to protect your eyes from any debris or adhesive splatters. Additionally, wear gloves to safeguard your hands and fingers while handling sharp objects or adhesive substances.
By using the right materials and tools for replacing your garage door seal, you can ensure a long-lasting and effective solution. Remember to follow the proper installation steps and take necessary safety precautions. Now, you are equipped with the knowledge to maintain your garage door and keep it in optimal condition all year round.
Tips and Tricks for Ensuring a Proper Seal When Replacing Your Garage Door Seal
Are you tired of dealing with a drafty and noisy garage? It might be time to replace your garage door seal. A proper seal is essential for keeping the elements out and maintaining energy efficiency. In this article, we will provide you with some valuable tips and tricks to ensure a smooth and effective garage door seal replacement.
First and foremost, it is crucial to measure the size of your existing garage door seal accurately. This will ensure that you purchase the correct replacement size. Using a tape measure, measure the width and height of your garage door opening. Make note of these measurements before heading to the store. Remember, an ill-fitting seal can lead to gaps, resulting in air leakage.
Once you have the measurements in hand, it’s time to choose the right type of garage door seal. There are various options available, including bottom seals, threshold seals, and weatherstripping. Consider factors such as durability, weather resistance, and ease of installation. It is also important to select a seal that is compatible with your specific garage door type and material.
Before starting the replacement process, it is essential to prepare the work area. Clean the garage door thoroughly to remove any dirt, debris, or old seal remnants. This will ensure a better seal adhesion and improve the overall effectiveness of the replacement.
Now, let’s dive into the steps for replacing your garage door seal:
| Step | Description |
|---|---|
| 1 | Open the garage door and secure it in place using clamps or locking mechanisms. |
| 2 | Remove the old seal by carefully pulling it out or cutting it with a utility knife. |
| 3 | Starting from one end, insert the new seal into the existing slot or track. Ensure that it is aligned properly. |
| 4 | Continue inserting the seal along the track until you reach the other end. Trim any excess seal material if necessary. |
| 5 | Test the seal by closing the garage door. Check for any gaps or areas where the seal is not fully compressed. |
| 6 | If needed, make adjustments to ensure a proper seal. This may involve repositioning the seal or adding additional material. |
| 7 | Once satisfied with the seal, remove the clamps or locking mechanisms and test the garage door’s operation. |
Remember, a proper garage door seal replacement is key to enhancing energy efficiency and protecting your garage from the elements. Don’t overlook this essential maintenance task!
In conclusion, by following these tips and tricks, you can ensure a proper seal when replacing your garage door seal. Remember to measure accurately, choose the right seal type, prepare the work area, and follow the step-by-step replacement process. Investing time and effort into this task will result in a well-sealed garage that is both energy-efficient and secure.
For more information and expert advice on garage door seals, you can visit (Garage Door Seals). Take control of your garage’s comfort today!
Frequently Asked Questions
A garage door seal is a rubber strip that is attached to the bottom of the garage door to prevent drafts, water, and pests from entering the garage.
You should replace your garage door seal if it is damaged, worn out, or no longer effectively sealing the garage door. A faulty seal can allow drafts, water, and pests to enter the garage.
You can check if your garage door seal needs to be replaced by looking for signs of wear and tear, such as cracks, gaps, or a deteriorated appearance. Additionally, if you notice drafts, water leakage, or an increase in pests inside the garage, it may indicate a faulty seal.
To replace a garage door seal, you will need the following tools: a utility knife, pliers, a rubber mallet, a measuring tape, a ladder, and a new garage door seal.
To remove the old garage door seal, follow these steps: 1. Open the garage door fully. 2. Use a utility knife or pliers to cut and remove the seal from the bottom of the garage door. 3. Dispose of the old seal properly.
To measure the length of the new garage door seal, follow these steps: 1. Close the garage door. 2. Use a measuring tape to measure the width of the garage door opening. 3. Add a few inches to the measurement to ensure a proper fit.
To install the new garage door seal, follow these steps: 1. Open the garage door fully. 2. Position the new seal along the bottom edge of the garage door. 3. Use a rubber mallet to gently tap the seal into place. 4. Trim any excess seal using a utility knife.
Yes, you can replace the garage door seal yourself. It is a relatively simple DIY project that requires basic tools and some patience.
The lifespan of a garage door seal can vary depending on factors such as usage, weather conditions, and quality of the seal. Generally, it is recommended to inspect the seal annually and replace it if necessary.
You can purchase a new garage door seal at hardware stores, home improvement centers, or online retailers specializing in garage door parts.


